M. Huddlestun: Project 2
Exercise 3
***
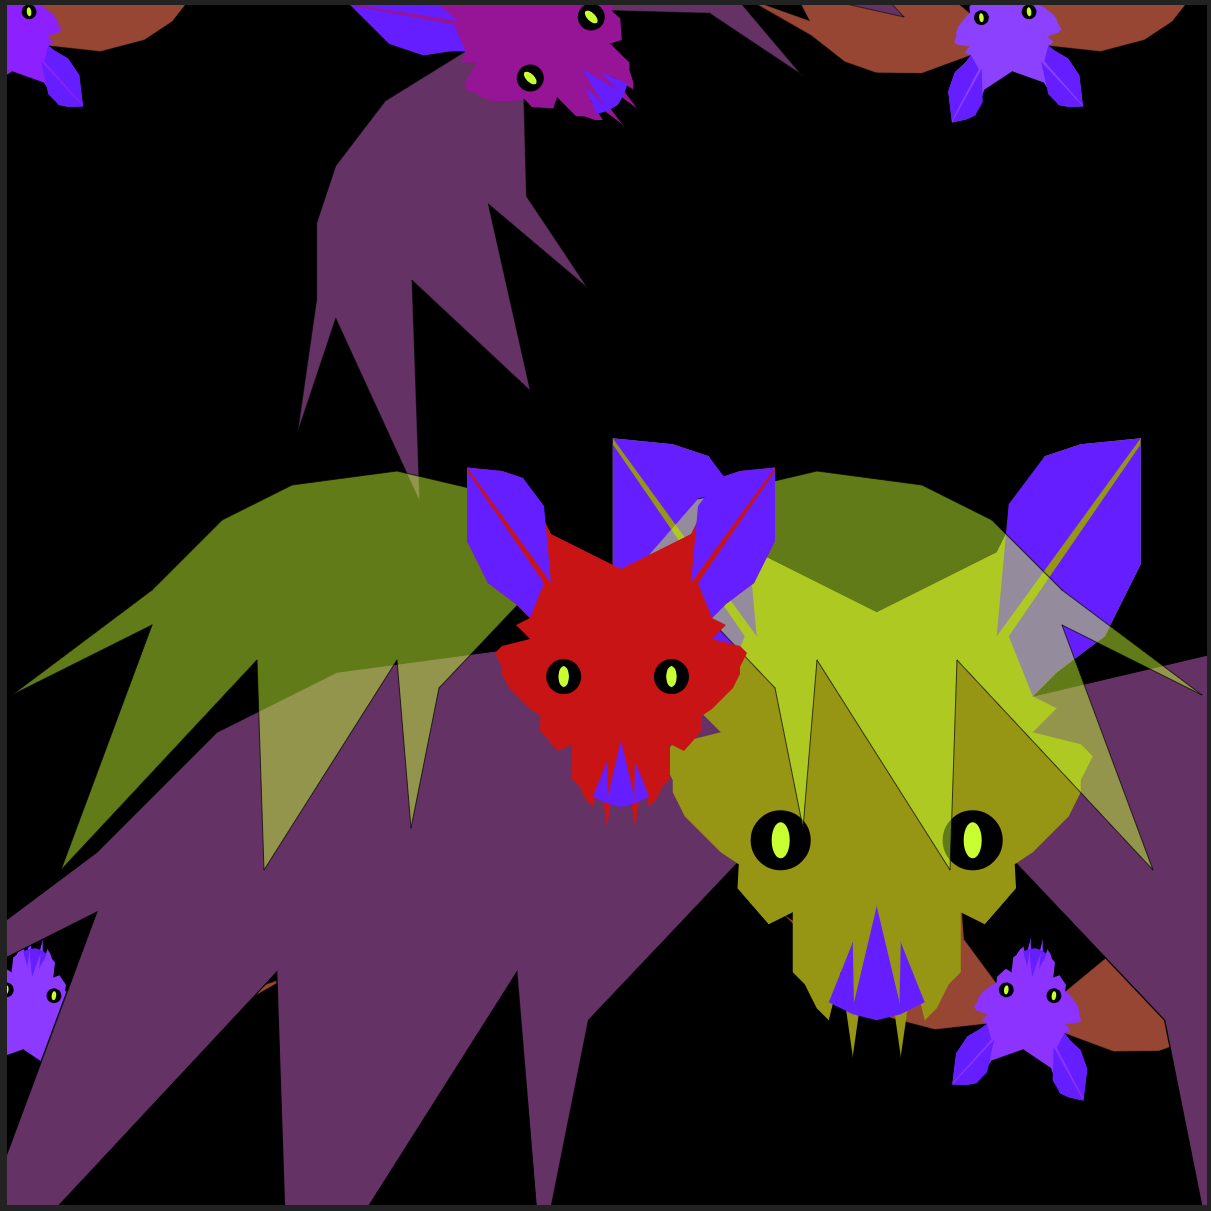
Here is a documentation of my third exercise from this class, where I focused on the construction of a creature in a modular fashion and worked to create differing iterations in a dynamic and varied composition.
In this project I worked with transformations such as push() and pop() for contained transformations, translate() to position and move my creature on the canvas, rotate() to change the degree at which the creatures were tilted, and scale() to change the sizes of my creatures. To do this I first created the parts of my bat creature and used a hierarchy of parent and child functions to construct the whole creature from these parts. I then took these custom child functions within the parent function and implemented the transfomrations mentioned previously. I created multiples of my creature to play with each aspect of the transformations and created a flying group of bats that use vector motion and wraparound code. The bat in the center's eyes are also changed in position slightly as the viewer moves their mouse about the screen.
Run Exercise 3
See code for Exercise 3
Excercise 4
***
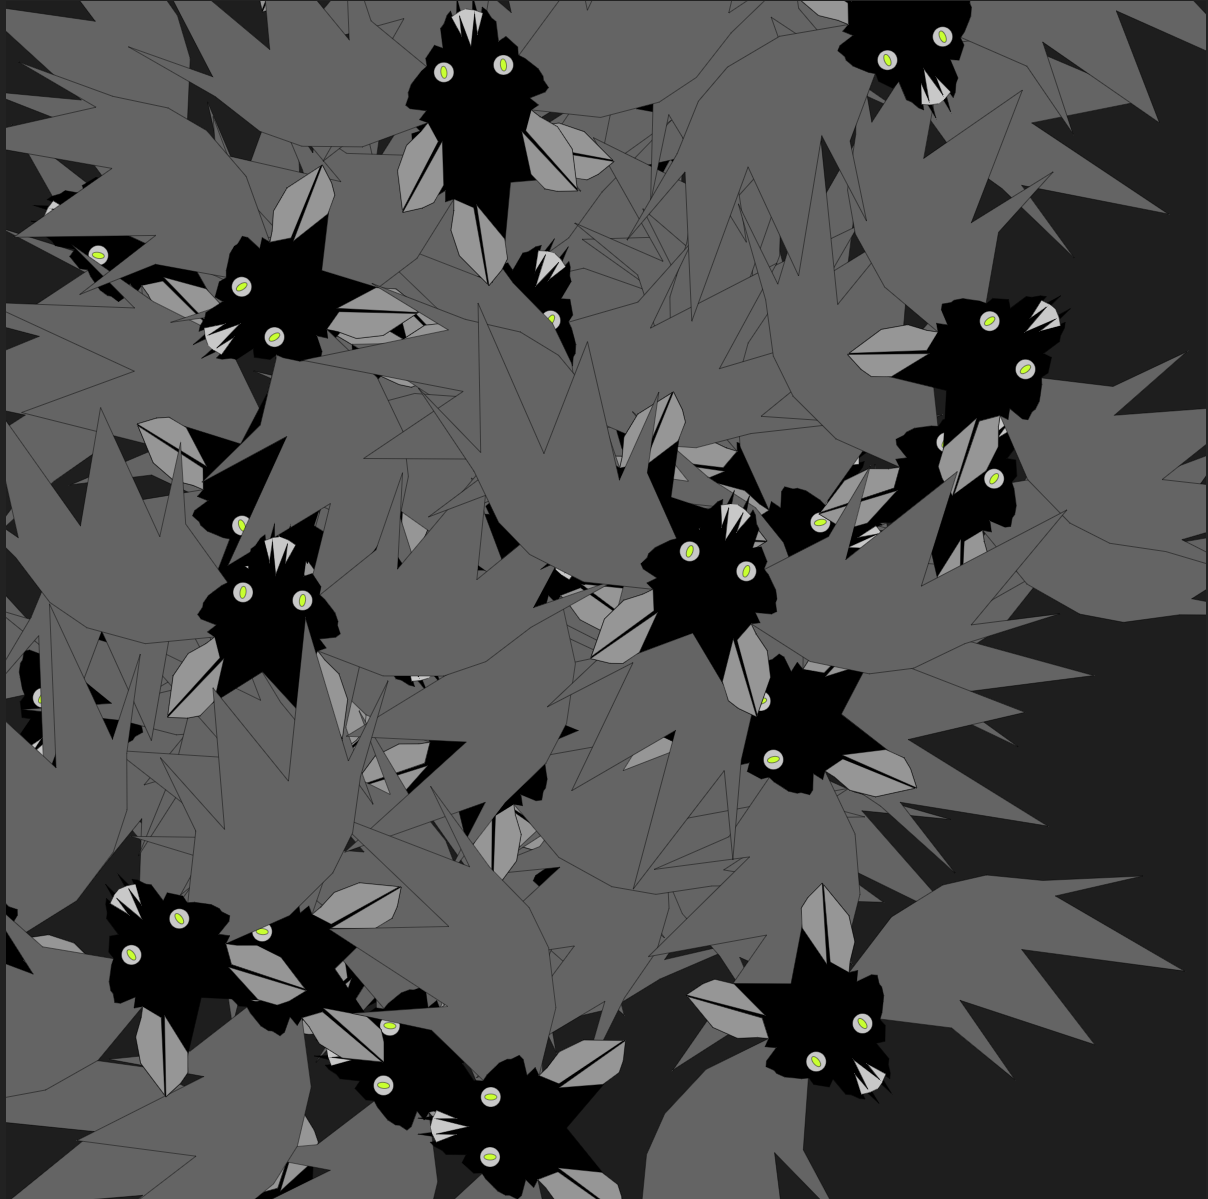
This documents my work on our fourth exercise, where the modularity and potential for generative manipulation I explored in Exercise 3 was built upon with the use of arrays, object oriented positioning, and the containment of the code for my bat creature becoming packaged in a class with various methods.
To achieve this, I first took my code for the custom functions used to construct my bat in the last project and restructured the code so that the creature was defined by a bat class. I then set up the constructor() with the necessary variables to control the elements of my bats' speed and positioning when called. I created methods to control how the bats would appear on the screen (mhBatDisplay and mhBatDisplay2) as well as the motion of the bats on the screen and how that would be dictated/contained (mhBatWrapVert and mhBatWrapHorizon). I returned to what I had learned in Exercise 3 by using transformations to bring a sense of life and variation to the bats, for example the main bat cluster has bats tilted in all sorts of angles as accomplished by the use of the rotate() command. I also used a nested push() and pop() to cause the wings to individual scale up and down at random increments, giving them the appearance of fluttering in flight. I used a seeded forloop to create a large number of bats, 25 bat objects were seeded into the loop. I used the () and [] brackets to define how the array would be set up and called. In relation to the mhBatDisplay2() method, the viewer of the piece may press any key throughout the duration of viewing to watch bats jump back and forth in an implied perspective while the bats controlled by mhBatDisplay() spread out across the screen and wrap around where set horizonal and vertical limits are set.
See object code for Exercise 4
See array code for Exercise 4

Project 2
***
For this assignment, I wanted to explore the use of the parametric equation algorithm which I had selected from a list of p5js examples and its potential for expressing the formal and linear qualitites of the object being mapped along its path. I felt that playing with the "three acts" sequence of the animation we were creating provided me with an opportunity to explore the different qualities of one of the most iconic and foundational shapes in p5js: the ellipse
In this animation, the work starts with a black screen and begins drawing ellipses following the specified parametric pathways to create shapes that I call 'coils'. These coils are generated and altered because I reconfigured the parametric equations example into a class with methods that controlled how the shapes were drawn and how they should behave. I created a custom class with arguments that would control the values modulating the ellipse's positioning as it moved and wrote custom methods that would change the size of the shape as well as its position translated on the canvas and the fill and stroke colors as necessary. There are also groups of three methods in between my custom methods labeled x1A(), y1A(), x2A(), and y21(), x1B(), y1B(), x2B(), and y2B(), and (you may be sensing a pattern here...) x1C(), y1C(), x2C(), and y2C(). These methods contain the math of the algorithm that tell the circles what path they should be following. Aesthetically, my project begins with a group of three coils defined by my first method- the leftmost coil that is filled red with a black stroke color, the center coil that is black with a white stroke color, and the rightmost coil that is white with a red stroke color. Each coil has a mid-low alpha value for the fill color, so that there is a decent amount of transparency to expose a textural and dimensional quality to the shapes. The second scene relies on my second method- three coils following the same fill color definitions I gave in the previous scene's explanation with no stroke this time. I also lowered the alpha value of this fill more severly to play with the accumulation of strokes on the canvas from a shape so often used to create brush tools. In my third scene I am using my third custom method to create two coils this time, one with a black fill and white storke and one with a red fill and black stroke. These are the most transparent fills yet, but also the stronger of the strokes. This means that the linear quality of the ellipses' outlines creates the illusion of a 3D framework while drawing out linear patterns through the accumulation of lines overlapped with low-opacity fills. Each of the coils displayed throughout the animation is mapped to a slightly different configuration thanks to the arguments in the constructor of the class, and each coil is also set to a different point of translation thanks to the 'td' argument in my three main methods. The background is set to draw in setup() and draw() with a low-opacity black color to shade and chase the movement of the ellilpses.
I think this piece was successful in its iteration on the utility of a selected algorithm and base shape, as well as the way that I was able to explore the qualities of shape, line, and form to create dynamic visuals from the basic qualities of the ellipse.
I found it challenging to work with containerizing the original algorithm within classes and methods in part because the elements that had to be broken into separate methods also needed to talk to eachother. Methods are great for compartmentalization and utility, but I've found that they require a high degree of structure and specificity to produce functional dialogue. I also found the recording of the project difficult not so much for its actual function but because my frames were not recording in order for me. I believe that this may have been contributed to by the fact that the speed of the frame downloads was buffering on my computer and downloads may not have been appropriately updating.
Custom Class:
mhSnakingCoils - the class that contains all of my methods, when called constructor arguments relate to modulating the math for the path the ellipses follow (xm1, ym1, zm1, xm2, ym2, zm2)
Custom Methods:
mh3DCoilDisplay(td, sr, sg, sb, sa, r, g, b, a) - the method used to render the act one coils, arguments dictate translation, stroke RGBA, and fill RGBA;
mhNoStrokeBrushCoilDisplay(td, r, g, b, a) - the method used to render the act two coils, arguments dictate translation and fill RGBA
mhLineFrameCoilDisplay(td, sr, sg, sb, sa, fa) - the method used to render the act three coils, arguments dictate translation, stroke RGBA, and fill alpha
The methods x1A, B, and C, y1A, B, and C, z1A, B, and Z and their x2A etc. counterparts are detailed in the main section of my statement above. Since they are a bit different in appliaction (and for the sake of some semblance of brevity in this very long section) I will not repeat their description here as well.
The original parametric equation algorithm used in this project is available * here *
Many thanks to the creator(s) behind this example! Credit is also provided in the description on the page where my sketch runs and within my code.
Below is a short video capturing the sequential animation that my project produces:
Code for Project 2