M. Huddlestun: Project 1
Exercise 1
***
This documents my first excercise in this class, where I was able to experiment with folding together a variety of p5js code examples and get more comfortable with the language and its structure.
With this sketch, I am largely developing my understanding of the key aspects of p5js to build a comprehensive foundation for further project. Conceptually, it was my goal to demonstrate an understaning of how variables can be defined and assigned, the use of commands with "overload functions", and the use of console.log as another layer of exection and interface. This was also a valuable project as it provided insight on how the 'for loop' and ladders of if-statements can be multifaceted tools for structuring code, as well as means for structuring draw objects relative to one another as well as the canvas.In this project, I used ellipses, rectangles, trianges, and curves. Depending on the aesthetic effect I wanted, I used fill adn stroke values (as well as noFill and noStroke). For examle, I played with shapes set to noFill() in order to create a framework/overlapping pattern effect. I used the 'let' command to establish variables and their associated values for the project, including experimenting with randomness generate variation in color and size of different objects. I played with console.log function as a way to recieve information on color values as the mouse moved between sections of my canvas and initiated shifts in which code was executed.'If' ladders and if/else structures were used to achieve these effects, by establishing quadrants of the canvas as areas where specific pieces of code are executed. I used a for loop in order to generate a series of strobing pixels in color-defined quadrants, which is triggered by the mouse moving into the lower half of the canvas. I was able to make these triggers possible by using the global width and height variables as well as the mouseX and mouseY variables. I also used the += shortcut in this part of the project and to generate variation in background color/grey scale depending on which half the mouse is in.
Run Exercise 1
See code for Exercise 1
Excercise 2
This section is a documentation of my second exercise, where I worked with a constrained grid, global values, switch statements, toggle logic, and external assets as my main focus. I also gained a deeper understanding of coding text and text attributes, as well as value of custom funtions.
Within my project, I have worked with a variety of mouse events and properties (mouseX, mouseY, and mouseIsPressed), key events and properties (keyPressed and keyIsPressed), rectMode, the assignment of a color object, the loading and orientation of image assets represented by global variables, the loading and customization of fonts (text, textSize, and loading in a sourced font), as well as the boolean logic option ||.
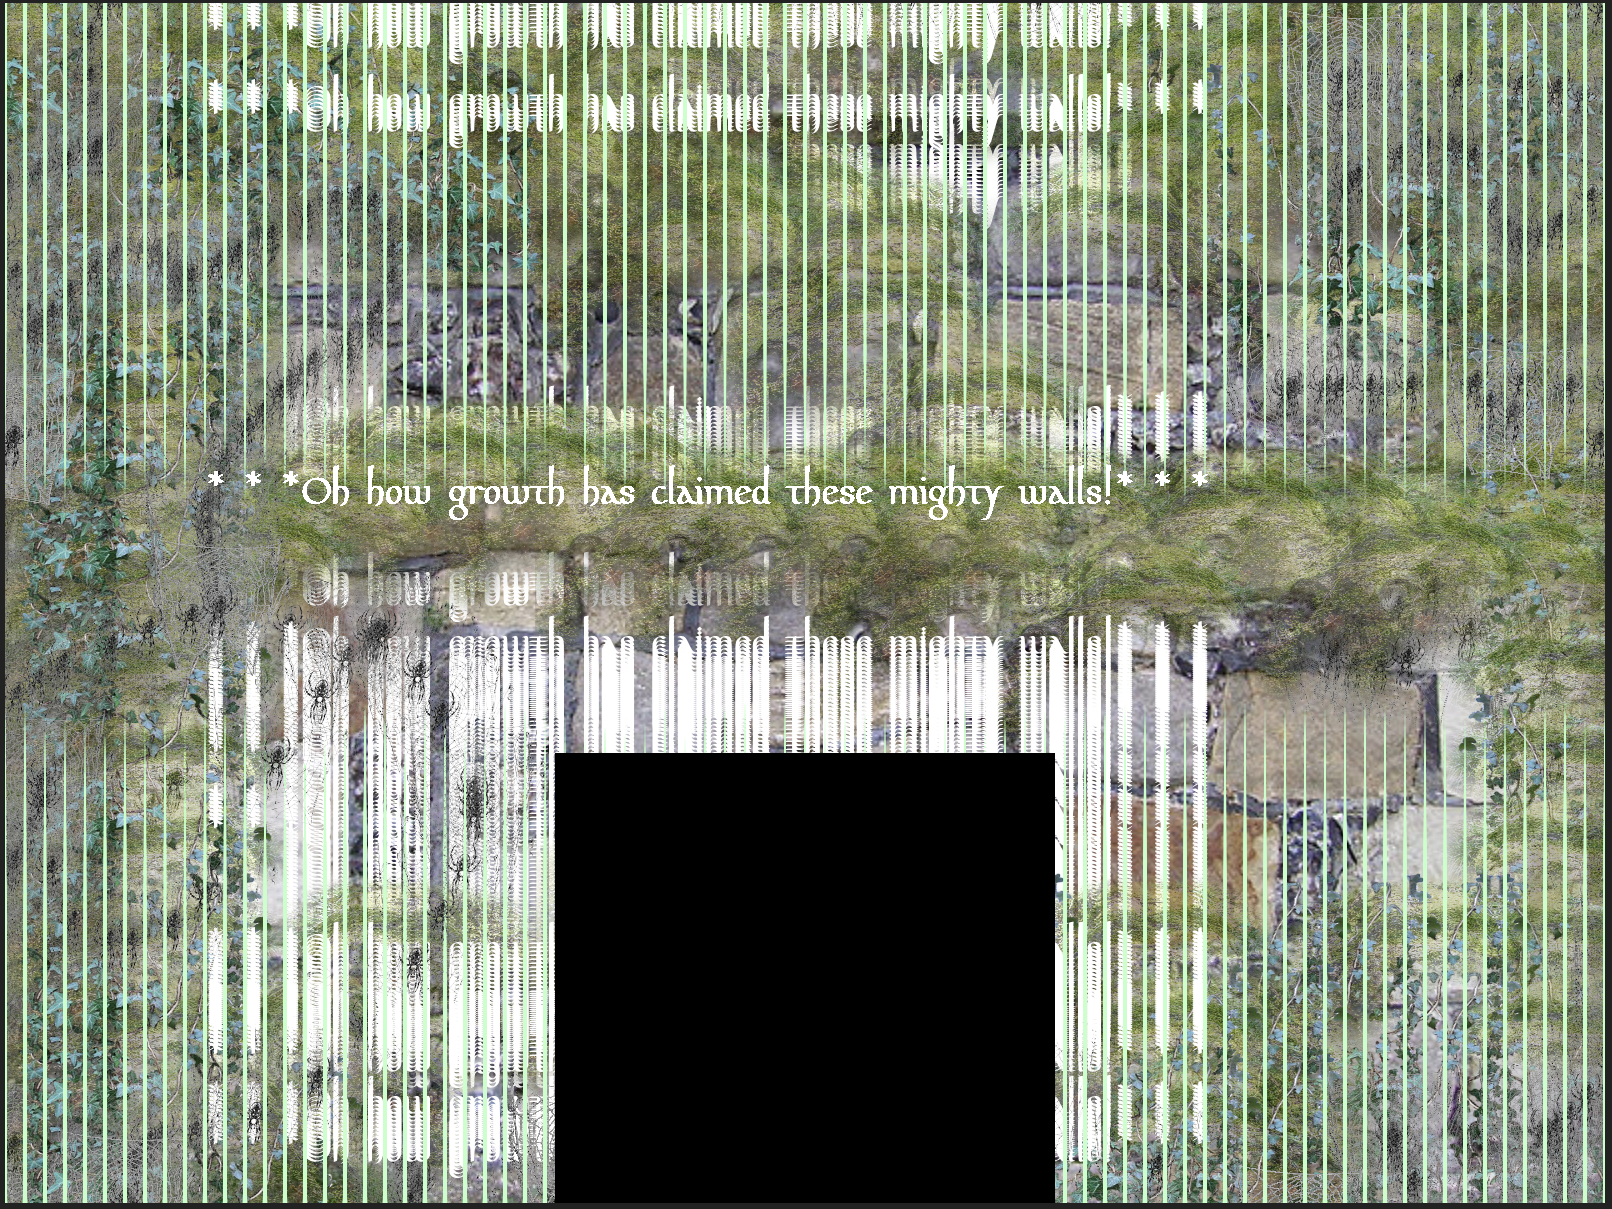
I wanted to use this exercise as a catalyst for my work in Project 1, playing with the ways that specificity can guide structure and function. I also had much more experience with figuring out how to order functions and generally structure my code so that order-specific actions were preserved when working with a wide array of actions within a single exercise. Users may press the WASD keys to move moss across the castle wall, press 'i' or 'v' to create overlays of ivy in different positions, 'b' to redraw the background over what has been drawn, press the mouse to trigger the words on the wall to drip, or press 'e' to toggle between a dark or light entryway. A veil of mossy, stretched ellipses covers the top and bottom of the screen, while the mouse generates a stream of spiderwebs that can be brushed across the castle's surface. I enjoyed this exercise and feel it greatly prepared me for Project 1, as an understanding of function freed me to be more invested in the marriage of action and aesthetic.
*All of my image and font assets are attributed within the code of this project, commented under my global variable assignments.
See code for Exercise 2

Project 1
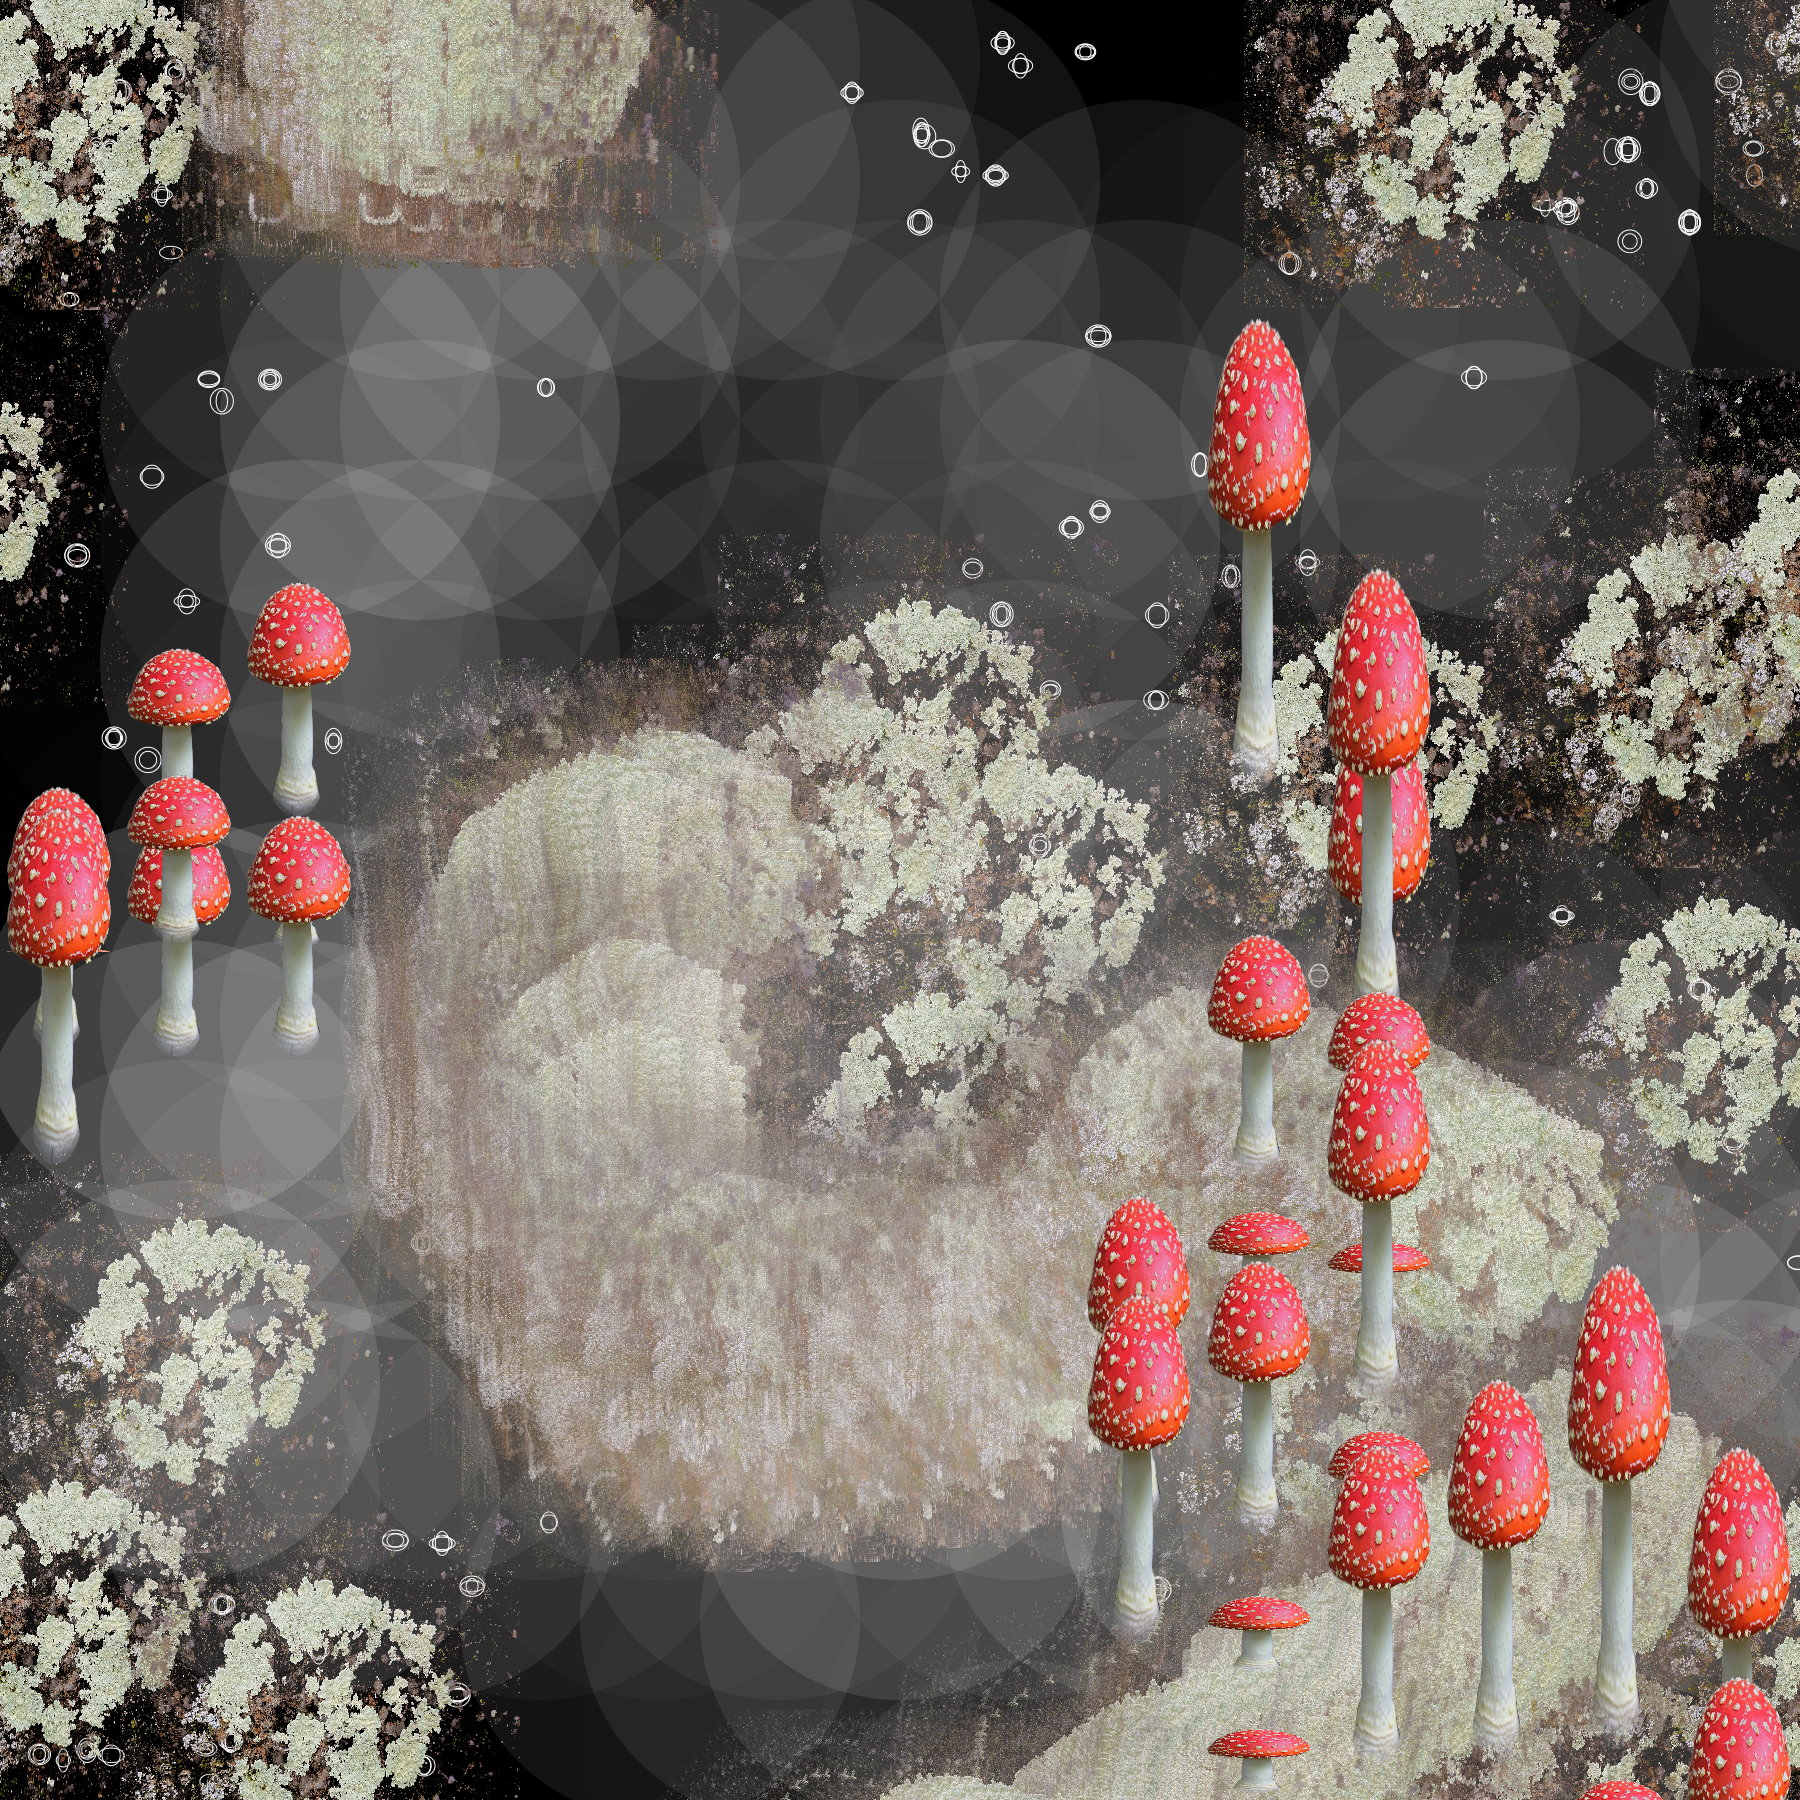
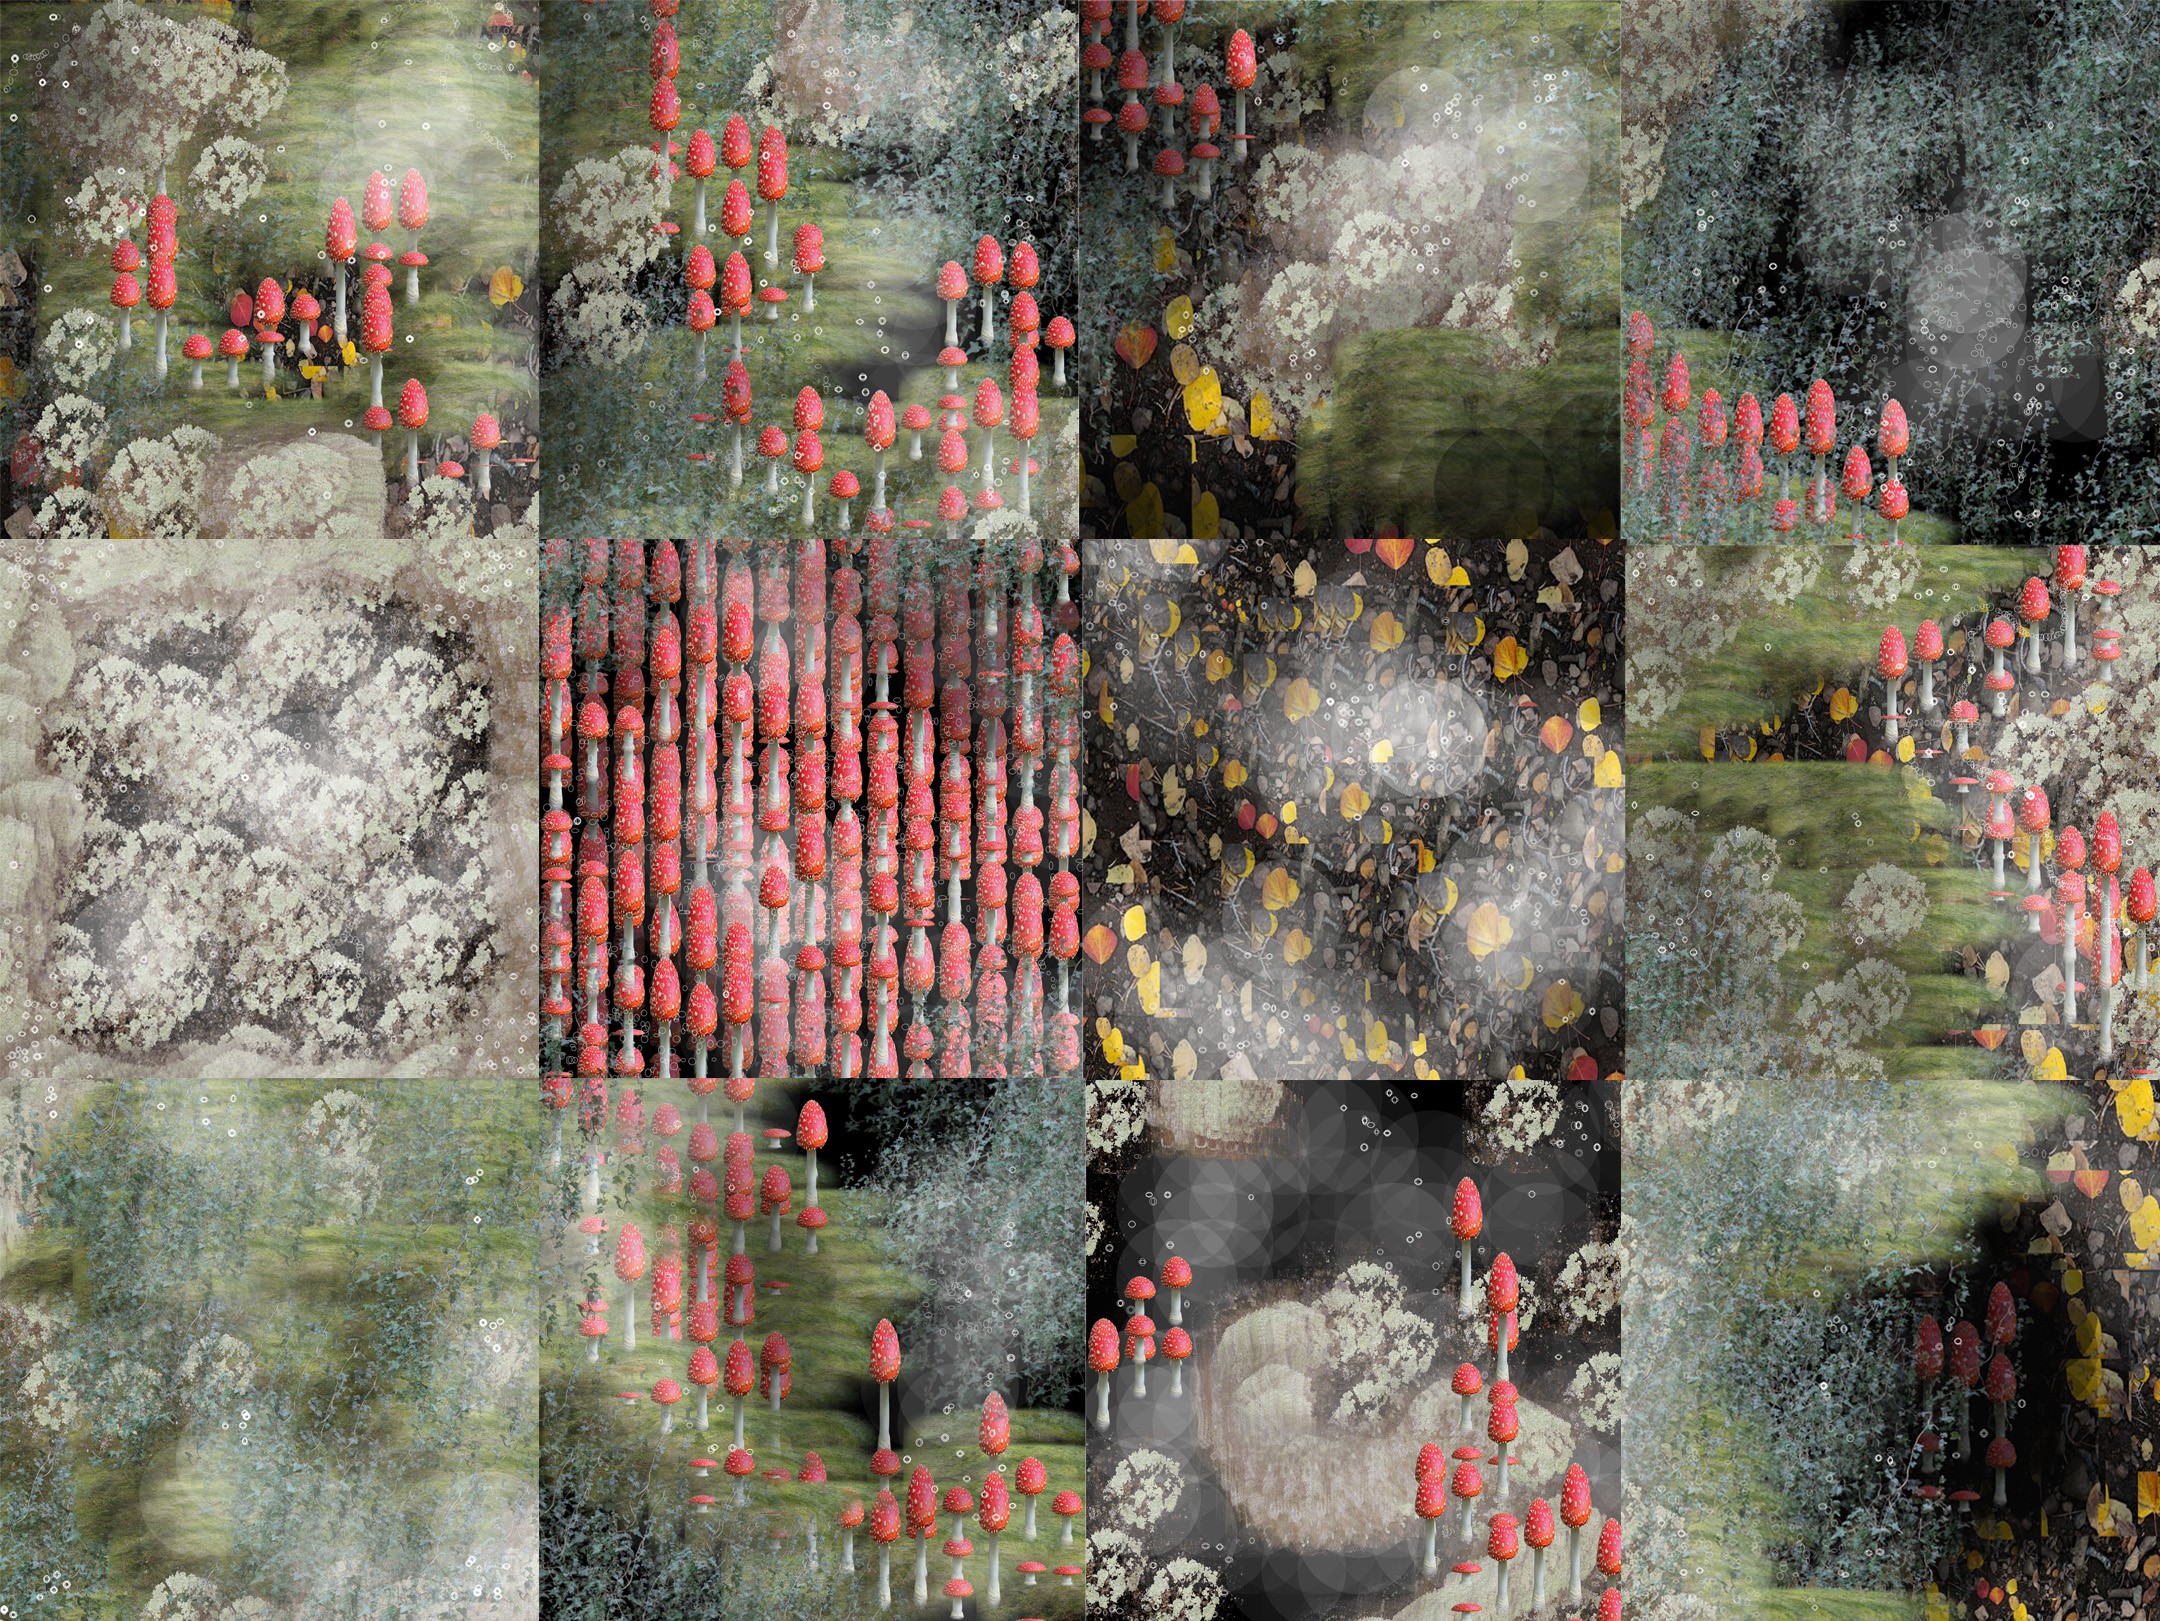
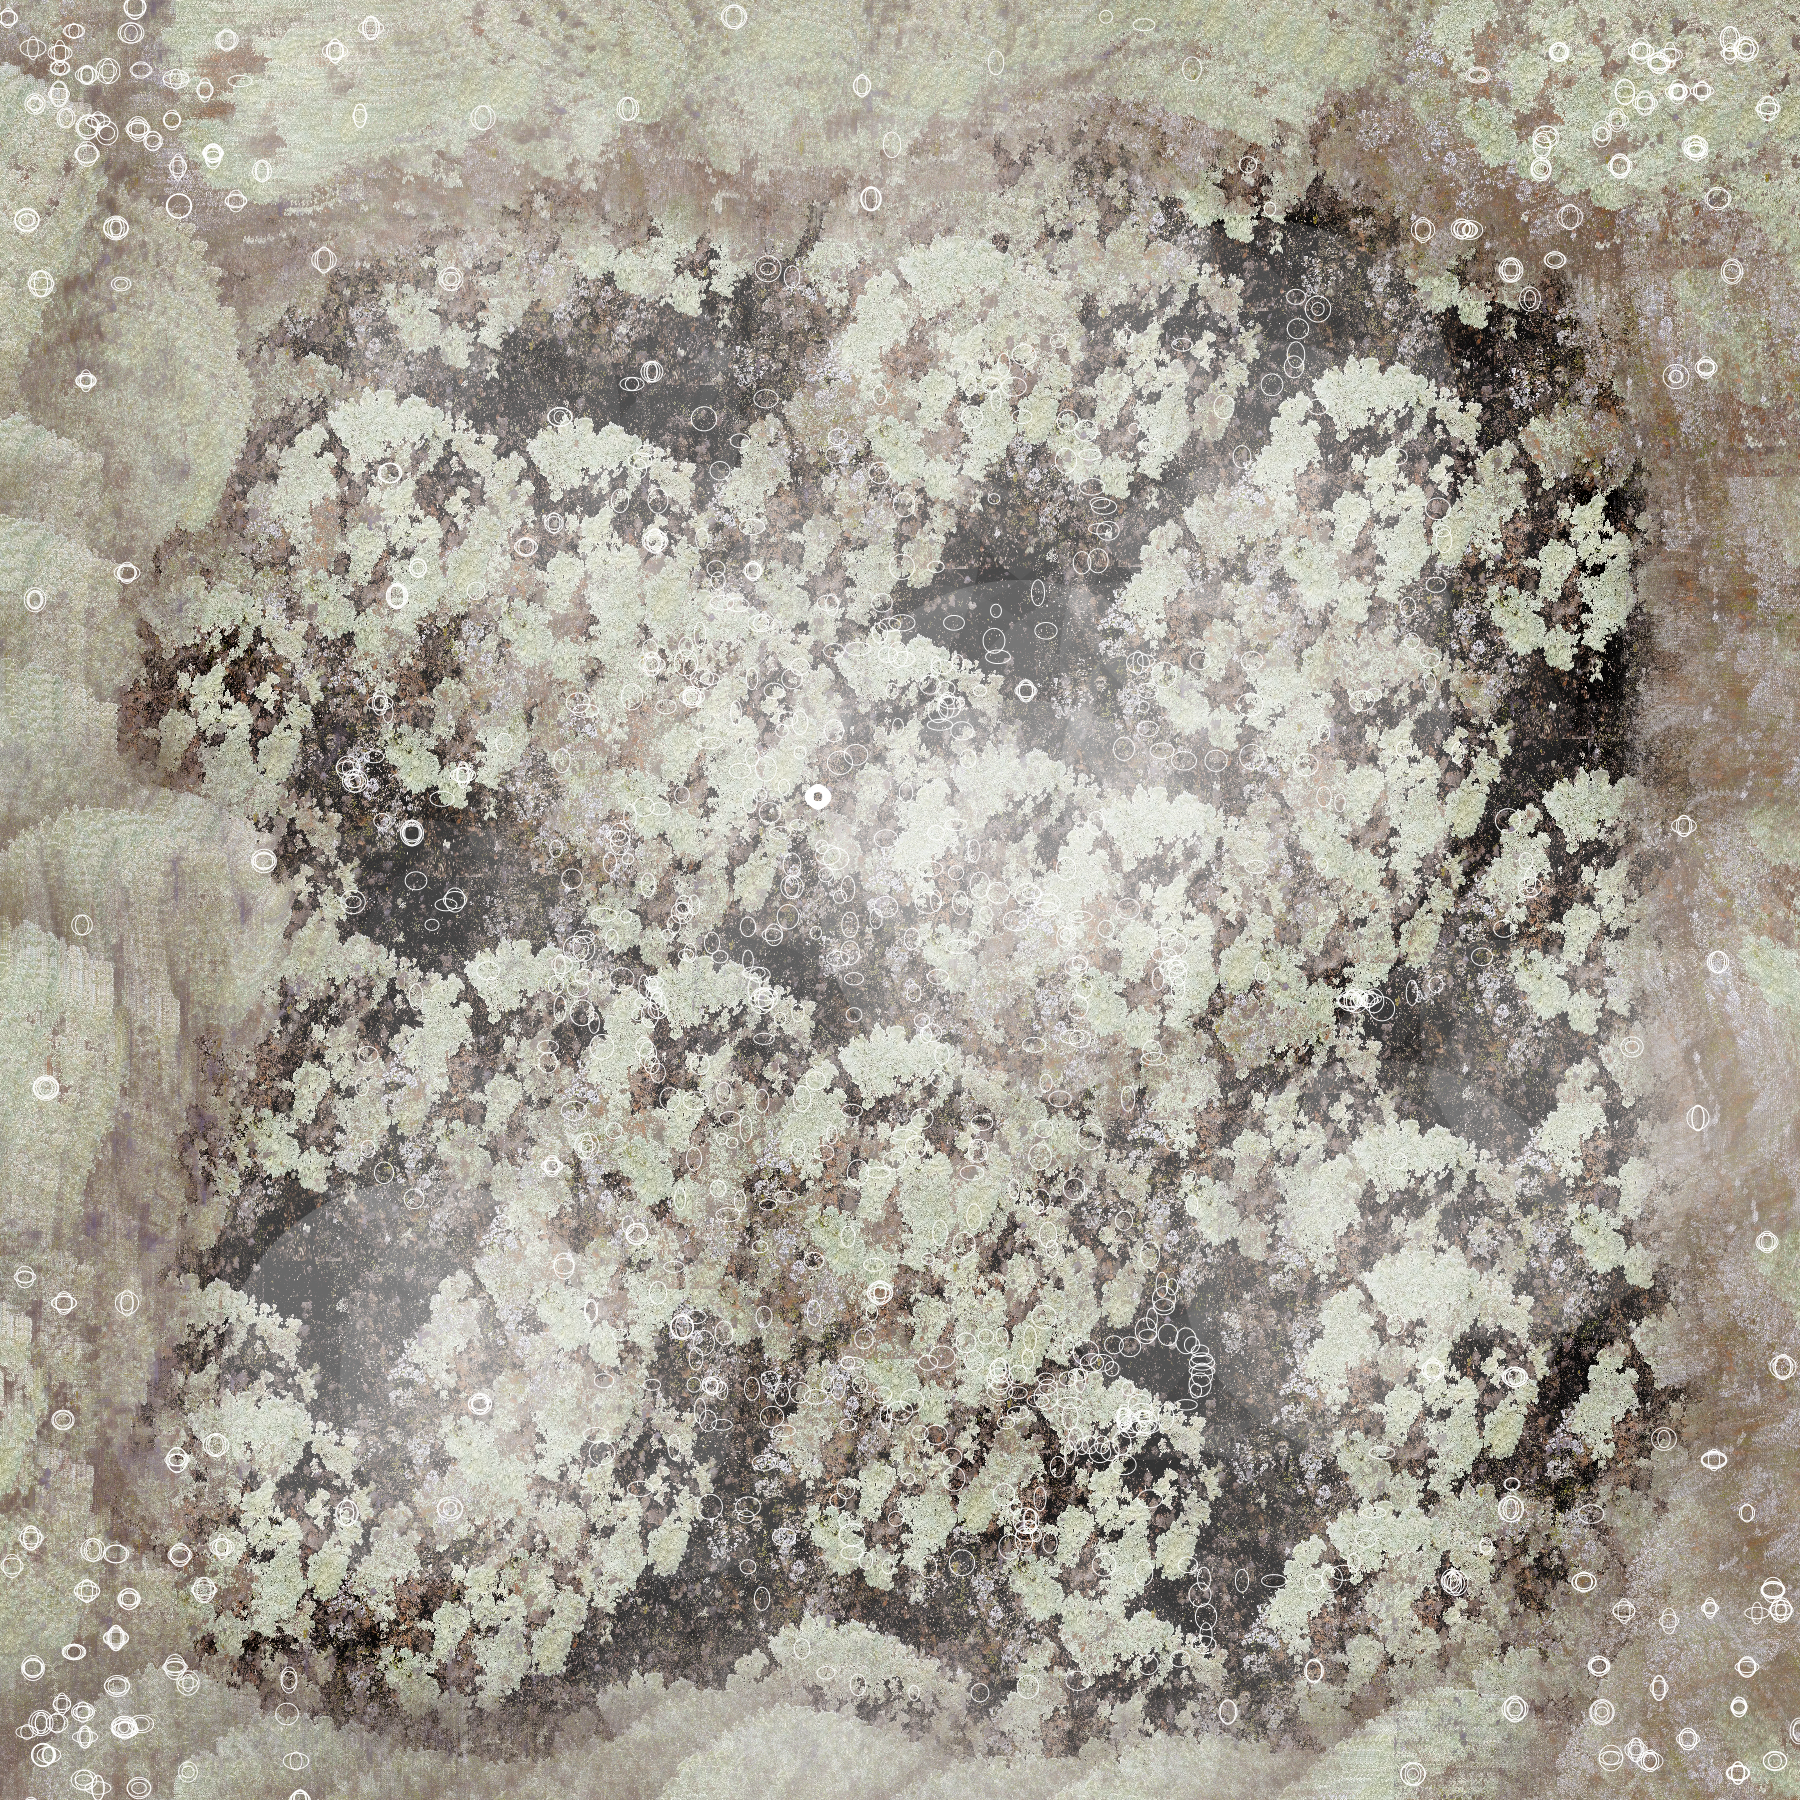
For this assignment, I was interested in the specificity of having stamps/brushes and embedded aesthetics that behaviorallly and visually express a particular subject of focus. When I was younger I used to have a book about the life of decomposers, soil, and the forest floor. I was reminded of this book when considering how I wanted to approach this projecting because there is something about clustering, layers, and accumulation which fits quite nicely within the realm of decomposition and growth. I edited image assets and used shapes to create stamps and brushes which would function in ways that fit the organic yet processual development of life and rot. This tool is interesting as it has a very particular type of image it is suited for, however a little creativity with how these stamps and brushes are used can yield a variety of whimsical and abstract, textile-like images that retain the same aesthetic qualities within their visual language.
In this program, the user begins with a black background. They may choose to work on top of this black background with different stamps and brushes to create a scene that is more surreal and sculptural, or they may press 'g' to use a stamp which will spread out patches of dead leaves and soil. From here, the keys 1-3 contain the stamp commands for moss, ivy, and mushrooms respectively. The WASD keys are used to determine the direction of this growth. The '4' key may be pressed to set your tool to a brush which the user may implement to lay patches of lichen. The '5' key will set the tool to a brush which draws interlocking white-lined orbs which mimic particulates, light quality, and tiny flying insects. The 'l' key is a stamp tool which paints soft white gradients and the 'k' key does the same in black. Together they may be used to create subtle patterns of light and shadow, as well as to suggest emphasis. The 'b' key may be pressed to create an eraser rectangle stamp tool. The 'x' key may be pressed to reset the canvas, and the 'p' key may be pressed to save a screenshot of the image. Enjoy!
I think this piece was successful in its faithfulness for a particular type of drawing, and I am especially happy with the fact that the particular stamp and brush algorithms were programmed with the behaviors of their associated organisms in mind (for example variation in size and transparency to simulate organic growth patterns, and brush/stamp assignment decisions based on the qualities of growth).
I found it challenging to work with randomness and positioning in a way that would balance a satisfyingly organic visual with a usser-friendly interface. While I enjoy a large degree of randomness from the perspective of someone deeply accustomed to the program, a new user would likely find a lack of control to such a high degree to be unreliable and/or frustrating. It also took me some trial and error to fuse the brush and stamp capabilities into one program; however in many ways this struggle was extrememly valuable in what it taught me and lead to the delayed gratification of having a workable project. If I had more time to develop this project, I would add many, many more stamps and brushes and I would make a larger canvas. I would love to let people get into a hyper-detailed approach with a variety of options for each type of organism, and rotting objects to build growth on top of.
Custom functions:
function mhMossMounds(img, xv, yv, s) - creates mounds of moss with randomly modulated size values, moves with greater freedom across gradients
function mhIvyCreep(img, xv, yv, s) - creates ivy which has been randomly modulated in size as well as tint, leading to variance in opacity for organic layering
function mhDenseGroundCover(img, xv, yv, s) - generates randomly clustered groundcover in varing sizes
function mhMushroomStretchPatch(img, xv, yv, s) - mushroom image asset with randomly modulated height values for clustering and organic variance
function mhDrawLichen(xv, yv, s, s) - creates a lichen paintbrush that follows the motion of the pressed mouse
function mhDrawParticles( xv, yv, s, s) - creates a paintbrush of small white-lines ellipses with no fill, randomly varying in dimensions
function mhDarkGradientCirc( xv, yv) - creates a black circle with a low opacity for shading and dimension
function mhLightGradientCirc( xv, yv) - creates a white circle with a low opacity for shading and dimension
*All of my image assets are attributed within the code of this project, commented under my global variable assignments.
Code for Project 1
img 3 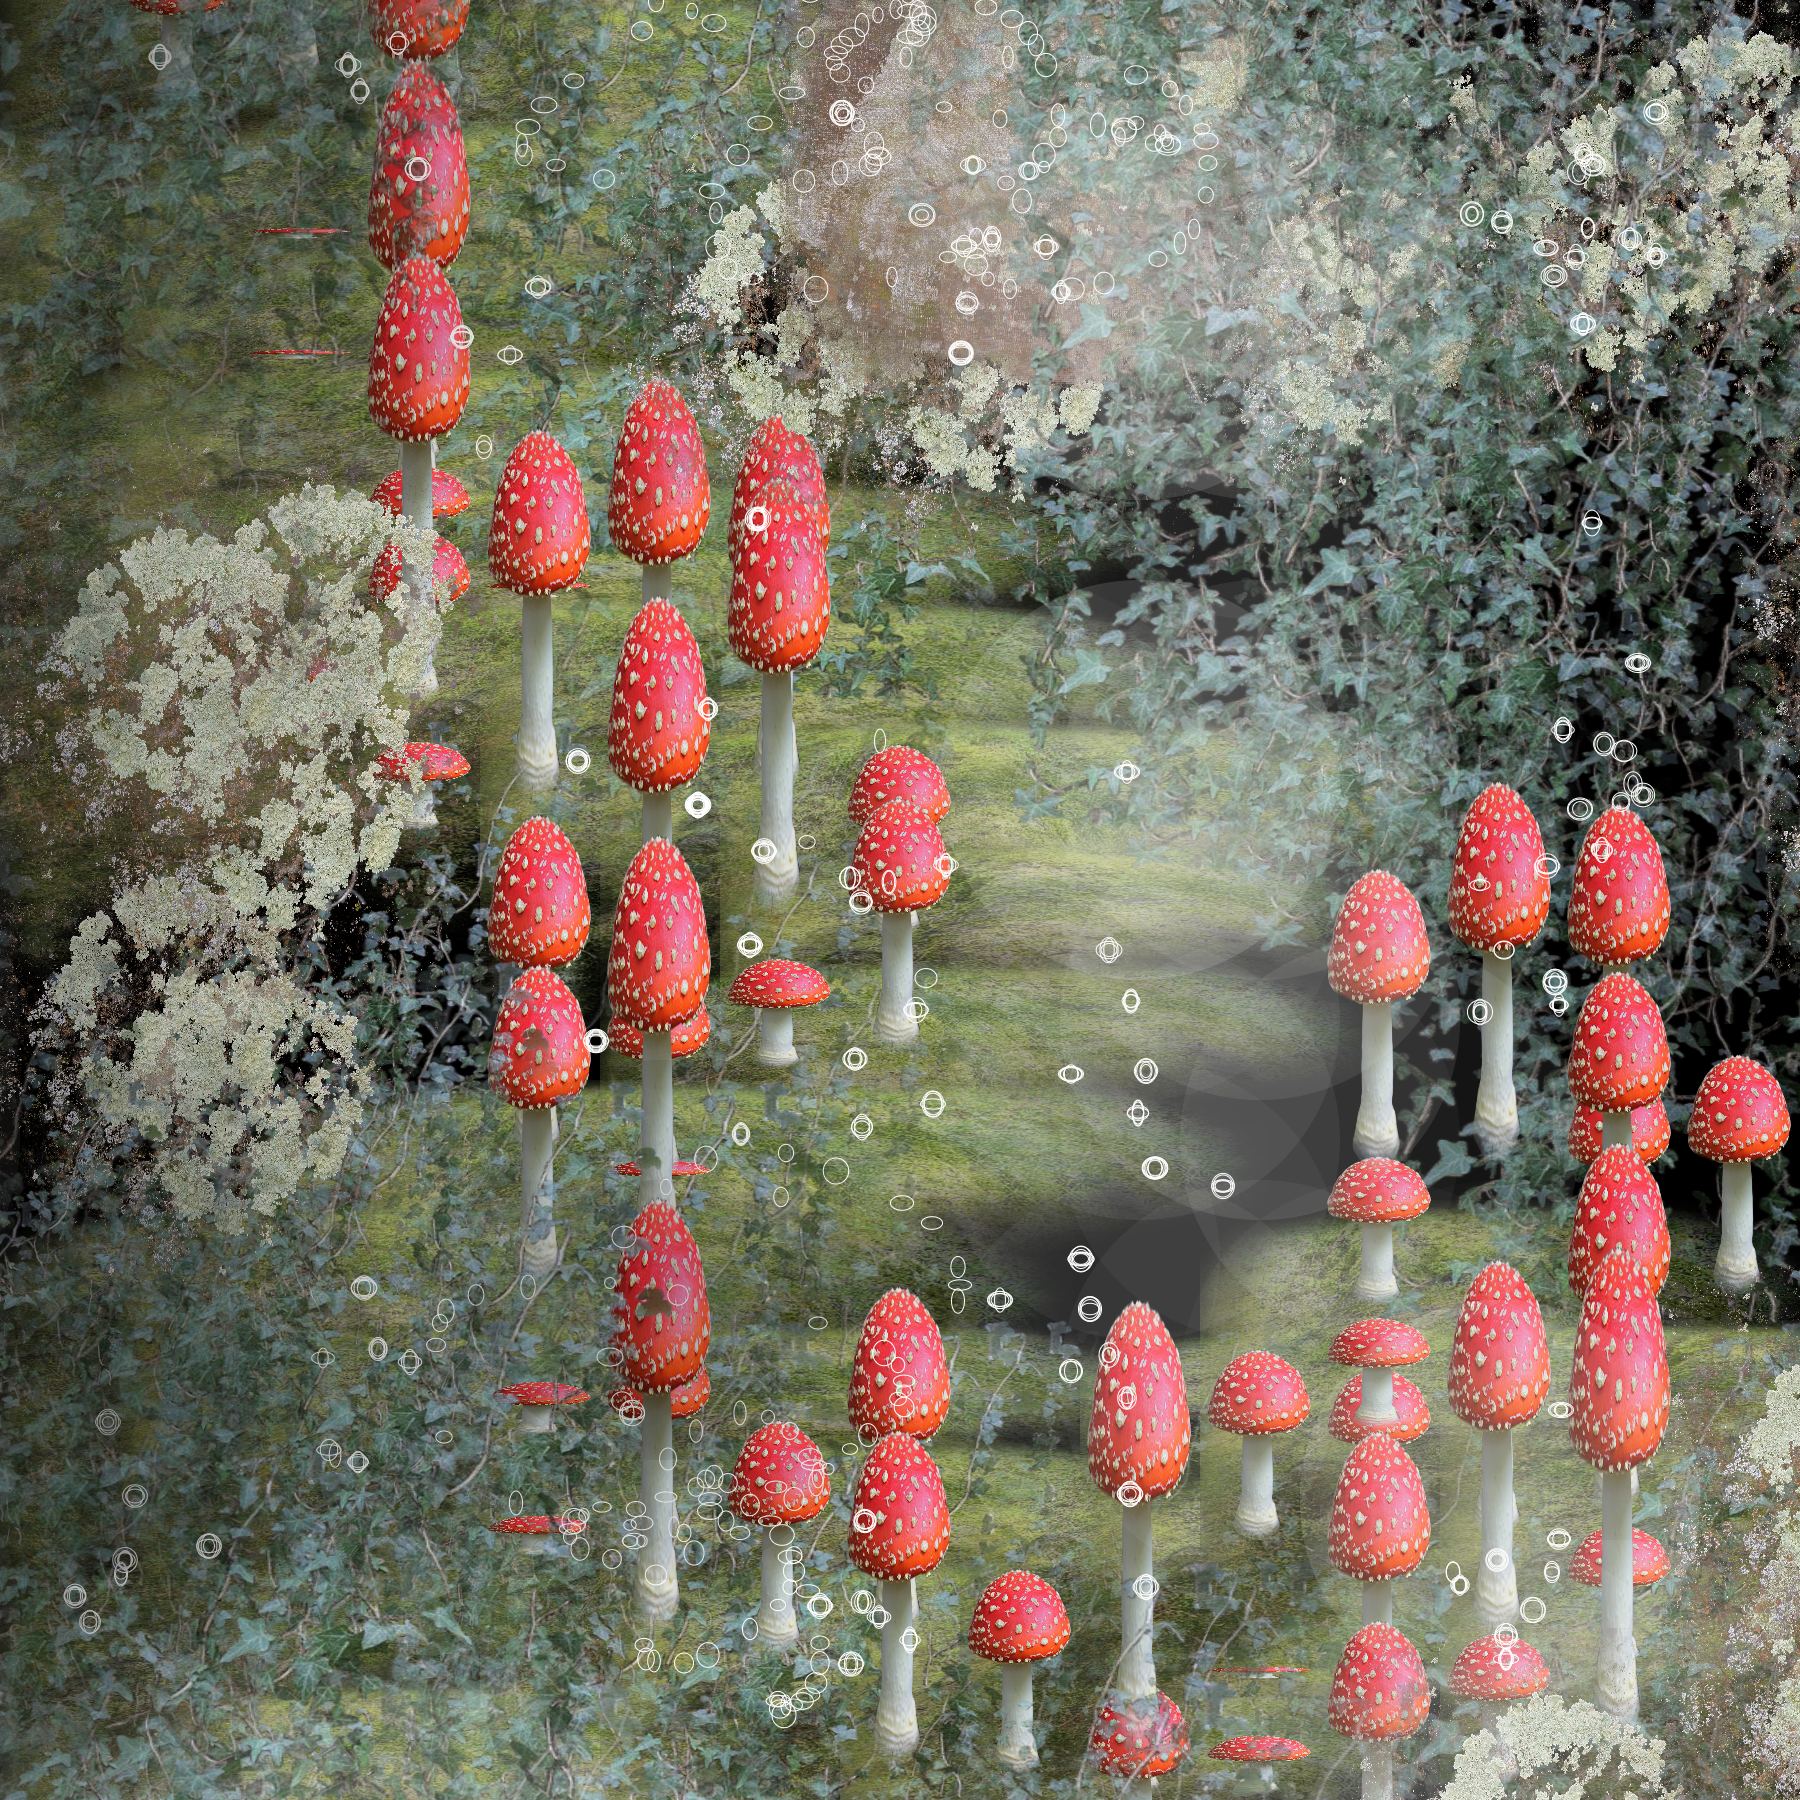
 img 4
img 4